Learn How to Crochet the Isabella Dress
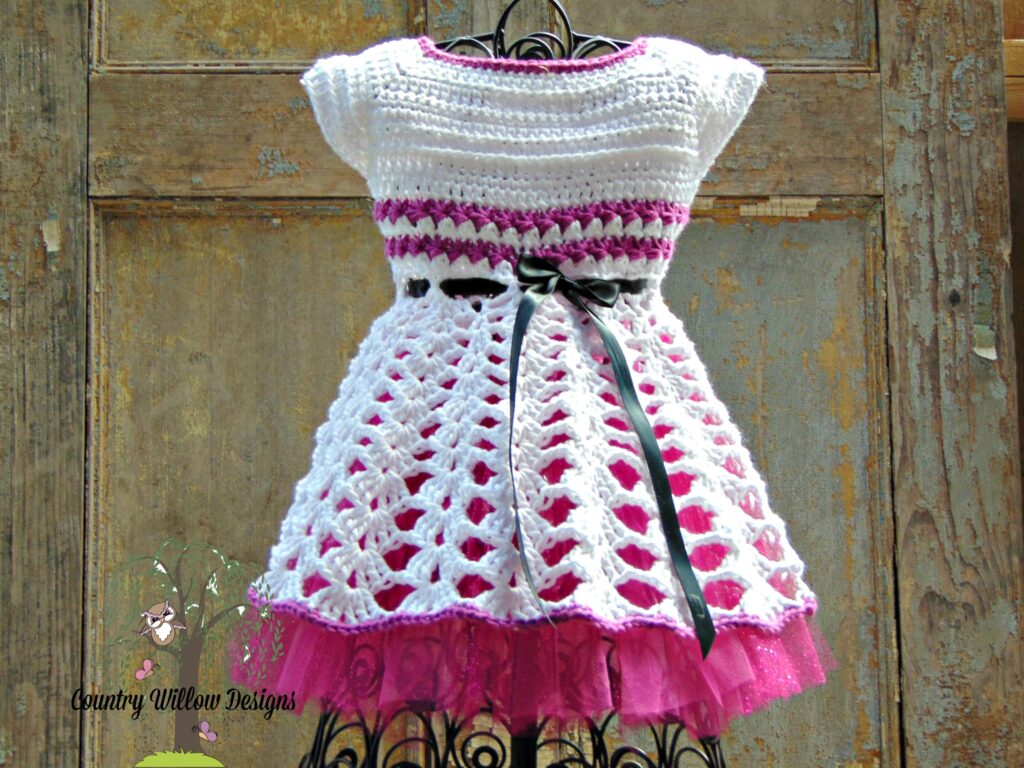
Learn how to Crochet the Isabella Dress. This crochet baby dress is easy and fun to make. I designed it using the star stitch around the bodice to add texture, and the bottom half consists of shells. An extra for you all: You don’t have to include this petticoat underneath this little beauty. I used I Love This Cotton yarn. Read more on this and see the different versions from my testers!
Learn How to Crochet the Isabella Dress
My favorite crochet projects are baby dresses and cardigans. Making this Crochet Isabella Dress was a perfect idea for Summer. This might be a summer of designs for dresses, cardigans, sweaters, and wall hangings. Below are 2 images from my pattern testers.
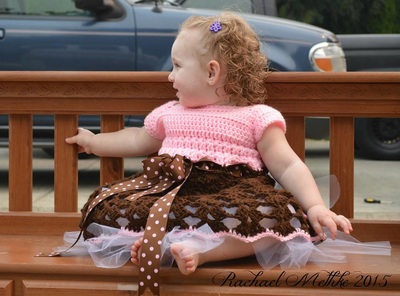
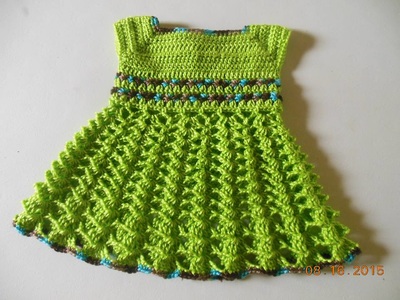
Crochet is really in right now, and crochet baby dresses are always a want of many makers. I enjoy I Love This Cotton yarn; it gives a drape to the crochet baby dress, and the yarn is so soft. This yarn is as follows:
- Content: 100% Cotton
- Yarn Weight: 4 – Medium
- Recommended Crochet Hook: 5.5mm (USA Size: I-9 – UK Size: 5)
- Crochet Gauge: 13 Single Crochet x 14 Rows = 4″ x 4″
- Skein Weight: 3.5 Ounces
- Skein Yardage: 180 Yards

Materials:
- I Love This Cotton 2 skeins of White(MC) and one skein in Hot Orchid(CB)
- · H Hook
- · 6 small buttons
- · Tapestry Needle
- · Optional Ribbon
- · Tulle- I used 2 rolls of pink. The rolls measured 6 inches wide by 25 yards.
- · White thread
Stitches:
- · ch(s)- chain
- · sl st(s) – slip stitch(es)
- · st(sts)=stitch (stitches)
- · sc – single crochet
- · dc-double crochet
- · tr – treble crochet
- · t-ch- turning chain
- · CA- color A –White
- · CB – color B – Hot Orchid
- · RS- right side
- · sp(s)- spaces
- · rep-repeat
- · rnd- round
- MC-Master Color
Special Stitches:
Small Shell – (2 dc, ch 2, 2 dc) in desired st.
Medium Shell – (3 dc, ch 2, 3 dc)in desired st.
Large Shell – (3 tr, ch 2, 3 tr) in desired st.
Gauge: Hdc 2 inches by 2 inches = 4 rows and 9 stitches
Measurements:
Chest: 19 inches
From top of shoulder to bottom of hem: 15 inches
With CA Ch 55
Row 1: sc 2nd ch from the hook, sc in the next 9 sts, 3 sc in the next st, sc in the next 5 sts, 3 sc in the next st, sc in the next 20 sts, 3 sc in the next st, sc in the next 5 sts, 3 sc in the next st, sc in the last 10 sts. (62 sts)
Row 2: ch 1, turn, hdc in the same st as ch 1, hdc in the next 10 sts, 3 hdc in the next st, hdc in the next 7 sts, 3 hdc in the next st, hdc in the next 22 sts, 3 hdc in the next st, hdc in the next 7 sts, 3 hdc in the next st, hdc last 11 sts. (70 sts.)
Row 3: ch 1, turn, sc in the same st as ch 1, sc in the next 11 sts, 3 sc in the next st, sc in the next 9 sts, 3 sc in the next st, sc in the
next 24 sts, 3 sc in the next st, sc in the next 9 sts, 3 sc in the next st, sc last 12 sts. (78 sts.)
Row 4: ch 1, turn, sc in the same st as ch 1, sc in the next 12 sts, 3 sc in the next st, sc in the next 11 sts, 3 sc in the next st, sc in
the next 26 sts, 3 sc in the next st, sc in the next 11 sts, 3 sc in the next st, sc last 13 sts. (86 sts.)
Row 5: ch 1, turn, hdc in the same st as ch 1, hdc in the next 13 sts, 3 hdc in the next st, hdc in the next 13 sts, 3 hdc in the next st, hdc in the next 28 sts, 3 hdc in the next st, hdc in the next 13 sts, 3 hdc in the next st, hdc last 14 sts. (94 sts.)
Row 6: ch 1, turn, hdc in the same st as ch 1, hdc in the next 14 sts, 3 hdc in the next st, hdc in the next 15 sts, 3 hdc in the next st, hdc in the next 30 sts, 3 hdc in the next st, hdc in the next 15 sts, 3 hdc in the next st, hdc last 15 sts. (102 sts.)
Row 7: ch 1, turn, hdc in the same st as ch 1, hdc in the next 15 sts, 3 hdc in the next st, hdc in the next 17 sts, 3 hdc in the next st, hdc in the next 32 sts, 3 hdc in the next st, hdc in the next 17 sts, 3 hdc in the next st, hdc last 16 sts. (110 sts.) sl st to join and begin working in the round.
Rnd 8 (RS): ch 1, hdc in the same st as ch 1, hdc in the next 16 sts, 3 hdc in the next st, hdc in the next 19 sts, 3 hdc in the next st, hdc in the next 34 sts, 3 hdc in the next st, hdc in the next 19 sts, 3 hdc in the next st, hdc last 17 sts. (118 sts.)
Armhole Row
Rnd 9: ch 2, hdc the next 20 sts, ch 2, sk next 21 sts, hdc next 37 sts, ch2, sk the next 21 sts, hdc into the last 18 sts. (79sts.)
Rnd 10: ch 3, dc in the same st, dc in each st around. (79 sts.)
CB Rnd 11: ch 4, draw up a loop in the 2nd ch from the hook, draw up a loop in the next ch, draw up a loop in the next 3 dc, YO, pull through all 6 loops on hook, * ch 2, pull up a loop in the 2nd ch from hook, in center of previous eyelet, in same ch as last eyelet made, and in the next 2 dc, YO, and draw through all 6 loops on hook,* rep. from * to * around to last ch, ch 1 to close sl st to join. (39 eyelets)
CA Rnd 12: ch 3(counts as 1st dc), 2 dc in the center of each eye around, sl st to ch 3. (79 dc)
CB Rnd 13: ch 3, pull up loop from 2nd ch from hook, in next ch, and in next 3 dc, YO, and draw through all 6 loops on hook, * ch 2, pull up a loop in the 2nd ch from hook, in center pf previous eyelet , in same ch as last eyelet made, and in the next 2 dc, YO, and draw through all 6 loops on hook,* rep. from * to * around to last ch, ch 1 to close sl st to join. (39
Rnd 14: Repeat row 12 (79dc)
Rnd 15: ch 5, sk 4 dc, sc between sets of dc, *ch 5, sk 4 dc, sc in next sp* rep from * to * around. (20 ch 5 sps)
Rnd 16: sl st to ch 5 sp, (ch 3 (counts as 1st dc), dc, ch 2, 2 dc) in next ch 5 sp,* ch 1, 1 dc in next ch 5 sp, ch 1, small shell*, rep from * to * around. (10 small shells)
Rnd 17: sl st to center of small shell, ch 3, 2 dc, ch 2, 3 dc in the same st as ch 3, ch 1,* 2 dc in next dc, ch 1, medium shell, ch 1*, rep from * to * around.
Rnd 18: sl st to center of medium shell, ch 3, ( 2 dc, ch 2, 3 dc) in the same st as ch 3, ch 1,* 3 dc in between 2 dc, ch 1, medium shell, ch 1*, rep from * to * around.
Rnd 19: sl st to center of medium shell, ch 3, ( 2 dc, ch 2, 3 dc) in the same st as ch 3, ch 1,* 4 dc in the middle of 3 dc, ch 1, medium shell, ch 1*, rep from * to * around.
Rnd 20: sl st to center of medium shell, ch 3, ( 2 dc, ch 2, 3 dc) in the same st as ch 3, ch 1,* sk 2 dc , 5 dcin next st, sk 5 dc, medium shell, ch 1*, rep from * to * around.
Rnd 21: sl st to center of medium shell, ch 3, ( 2 dc, ch 2, 3 dc) in the same st as ch 3, ch 1,* sk 3 dc , medium shell in next st, sk 5 dc, medium shell, ch 1*, rep from * to * around.
Rnd 22: sl st to center of medium shell, ch 3, ( 2 dc, ch 2, 3 dc) in the same st as ch 3, ch 1,* sk 3 dc , medium shell in next st, sk 6 dc, medium shell, ch 1*, rep from * to * around.
Rnd 23 and 24: repeat Rnd 22
Rnd 25: sl st to center of medium shell, ch 4, ( 2 tr, ch 2, 3 tr) in the same st as ch 3, ch 2,* sk 6 dc , large shell in next st, sk 6 dc, large shell, ch 2*, rep from * to * around.
Rnd 26, 27 and 28: rep Rnd 25
Rnd 29: sc in each st and ch around.
Finish off and weave in ends.
Neckline:
Start with RS and sl st CB. Ch 1 and sc in the same stitch as the join. Ch 7, sc in the next stitch (form ring for button). Sc in each stitch around and for the opening in the back.
Petticoat
Ch 75, sc in 2nd ch from hook, sc in each st around.
Row 2: ch 1, turn, sc in same st, *ch 2, sk 1 sc, sc in next sc*, rep from * to * around.
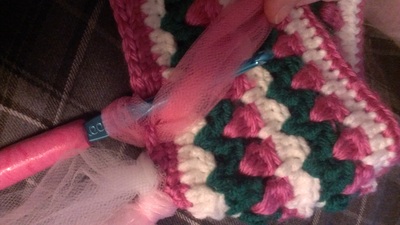
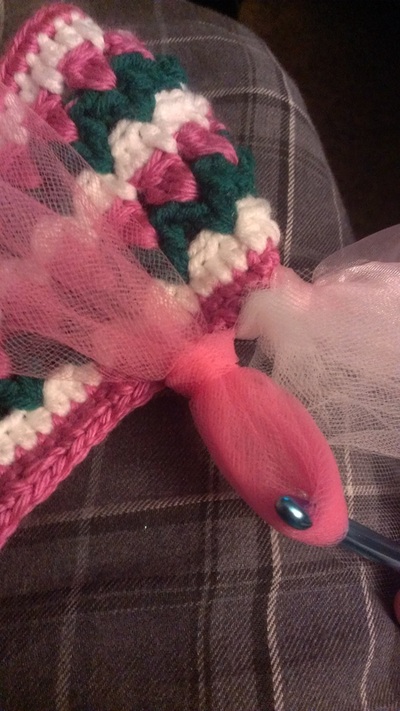
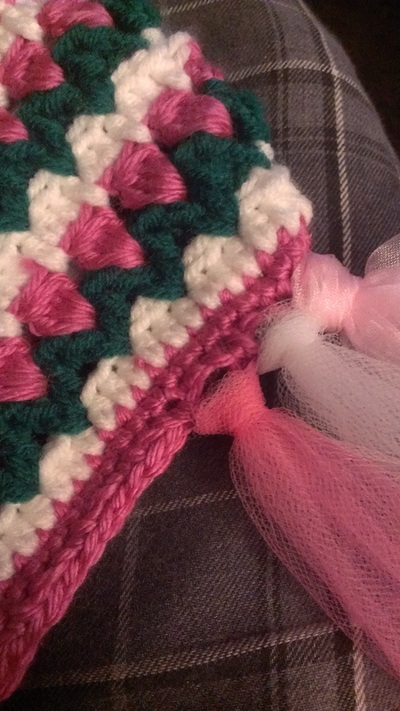
Cut tulle in lengths of 21 inches. Add tulle
I added tulle to every other ch 2 sp, skipping the first one. You can use 1 piece or more depending on your likes. I used one piece of tulle. Use the Lark Foot Knot to assemble the tulle
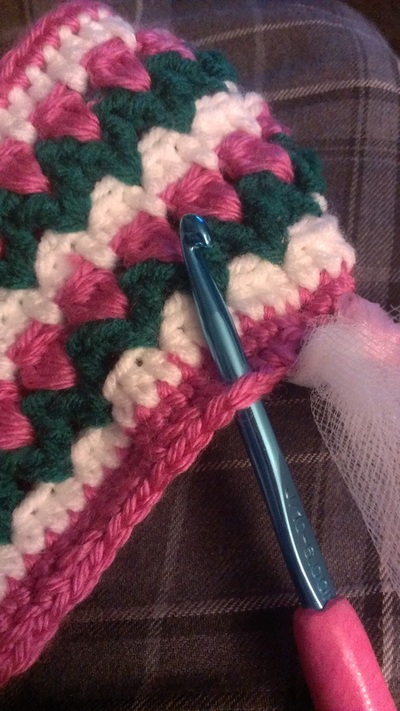
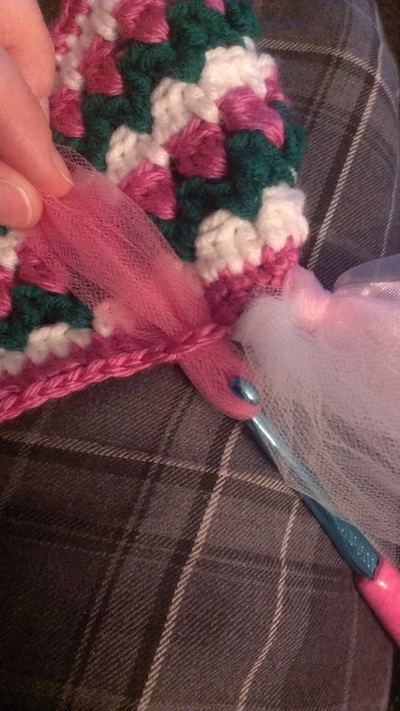
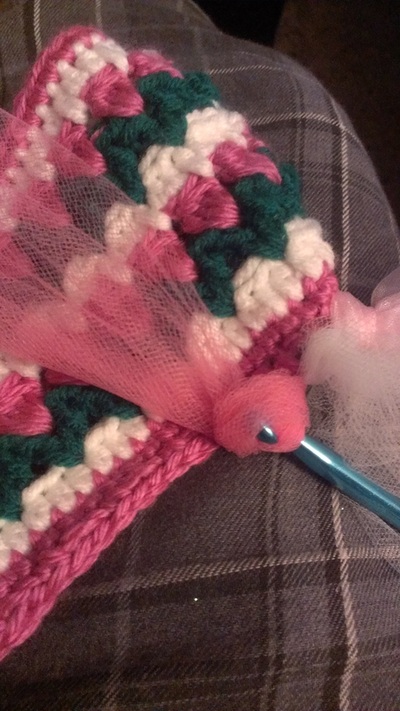
Add 4 buttons to the inside of the dress. The buttons should be located just above where the ribbon will be. I added 1 button on each side and one in the center front and center back. I used the empty first 2 chs as a buttonhole. Here, on the other side, you can adjust the fit.
Weave ribbon in and out and tie it in a bow, and you are finished.
This pattern has been tested, but mistakes can still happen like anything else. Contact me @ sheri@countrywillowdesigns if you should find any errors. Thank you so much and enjoy!
This pattern and its images are copyright-protected and the sole property of Country Willow
Designs. The written pattern is for personal use only. Purchase of the pattern does not entitle the purchaser to redistribute, transfer, or sell the pattern or alter it to claim it as his/her own.
If you choose to sell the finished product, please credit Country Willow Designs as the designer and provide a link to www.thecountrywillows.com in your online listing.
I hope you enjoy your finished product! If you have any trouble with the pattern, please e-mail me at [email protected] and I’ll do whatever I can to help.

